
What is SCIM?
SCIM is an open standard for automating user provisioning across domains, reducing the time and complexity typically associated with onboarding.
-
It removes the need for manual user management and minimizes human error, meaning program admins can spend more time with learners
-
Automatic syncing & updating of learner attributes
Requirements
Before configuring SCIM, ensure the following:
Azure (Microsoft Entra ID) Requirements
-
A user with Microsoft Entra ID Admin Center privileges
-
Existing SSO SAML 2.0 Application setup for Security Journey
Security Journey Requirements
-
An account with Admin privileges
-
SSO enabled in the Admin Settings
Supported Features
Our SCIM Integration support the following features:
-
Create new learners in Security Journey
-
Update learner details (name, email, department, etc.)
-
Archive/deactivate learners who no longer need access
Configuration Steps
Step 1: Enabled Provisioning in Security Journey's Entra ID's Enterprise Application
-
Sign in to the Microsoft Entra admin center as at least a Application Administrator.
-
Browse to Identity > Applications > Enterprise applications.
-
Find Security Journey from your list of Enterprise applications.
-
If SSO is not yet configured, follow the steps to setup SSO in Azure.
-
-
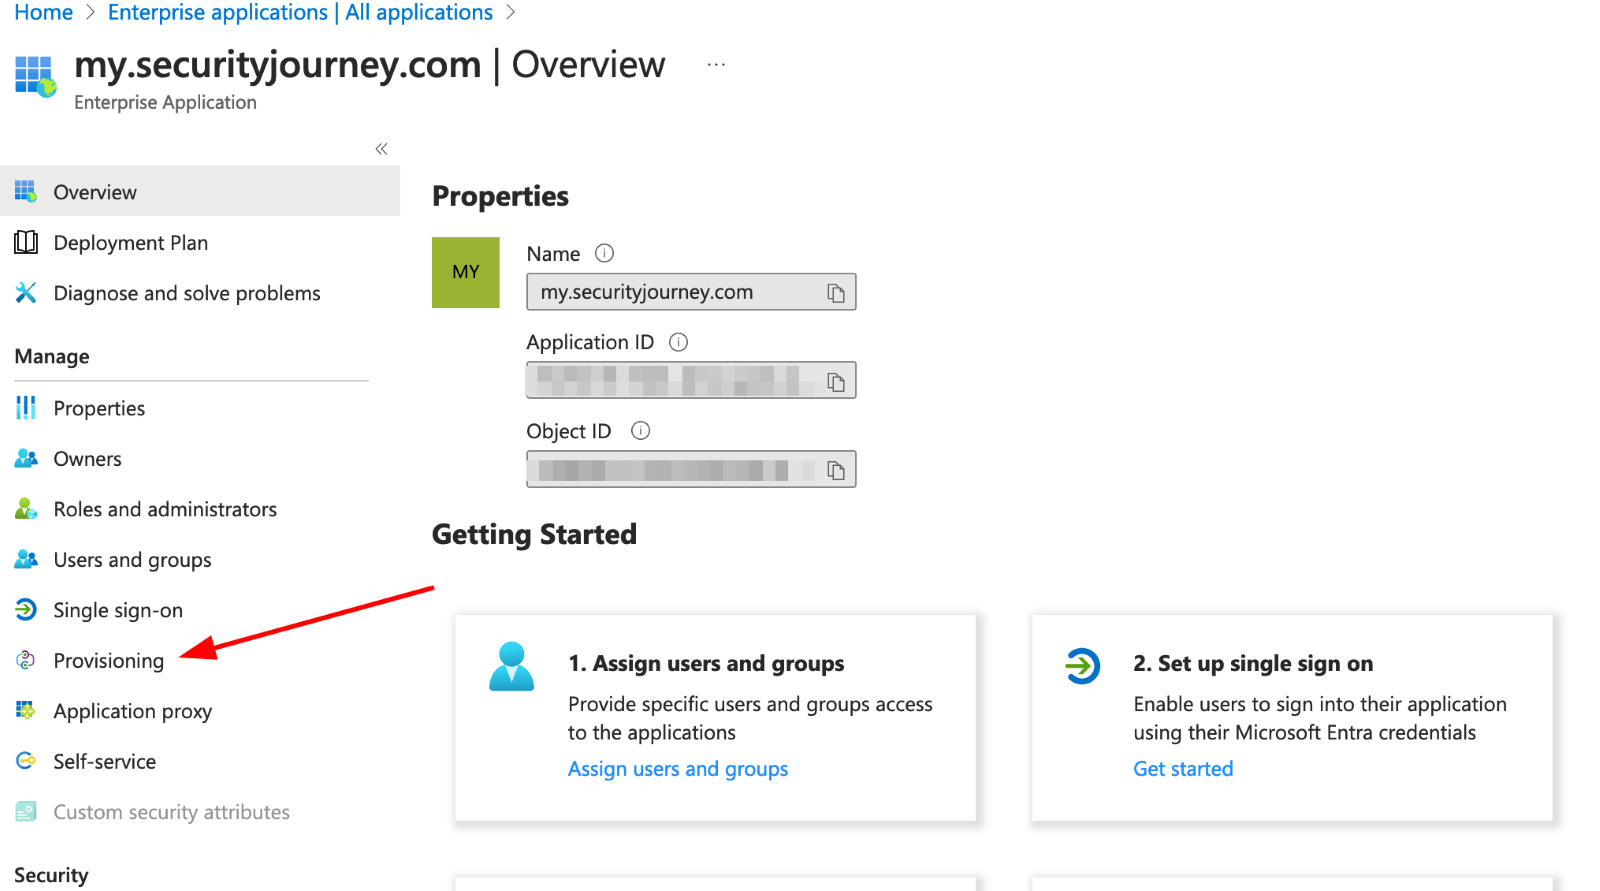
Select Provisioning to manage user account provisioning settings for the selected app.
Step 2: Retrieve Your SCIM Credentials in Security Journey
-
Log into Security Journey as an Admin.
-
Navigate to Connections > SCIM Settings.
-
Locate your company’s:
-
SCIM API URL
-
SCIM API Token
-
✅ Important: Copy your token immediately.
Once you navigate away from the SCIM settings page, the token will be hidden and cannot be viewed again.
If you do not copy the token before leaving the page, you will need to reset/regenerate the token to obtain a new one.
Step 3: Add Security Journey Credentials to the IdP Connection
-
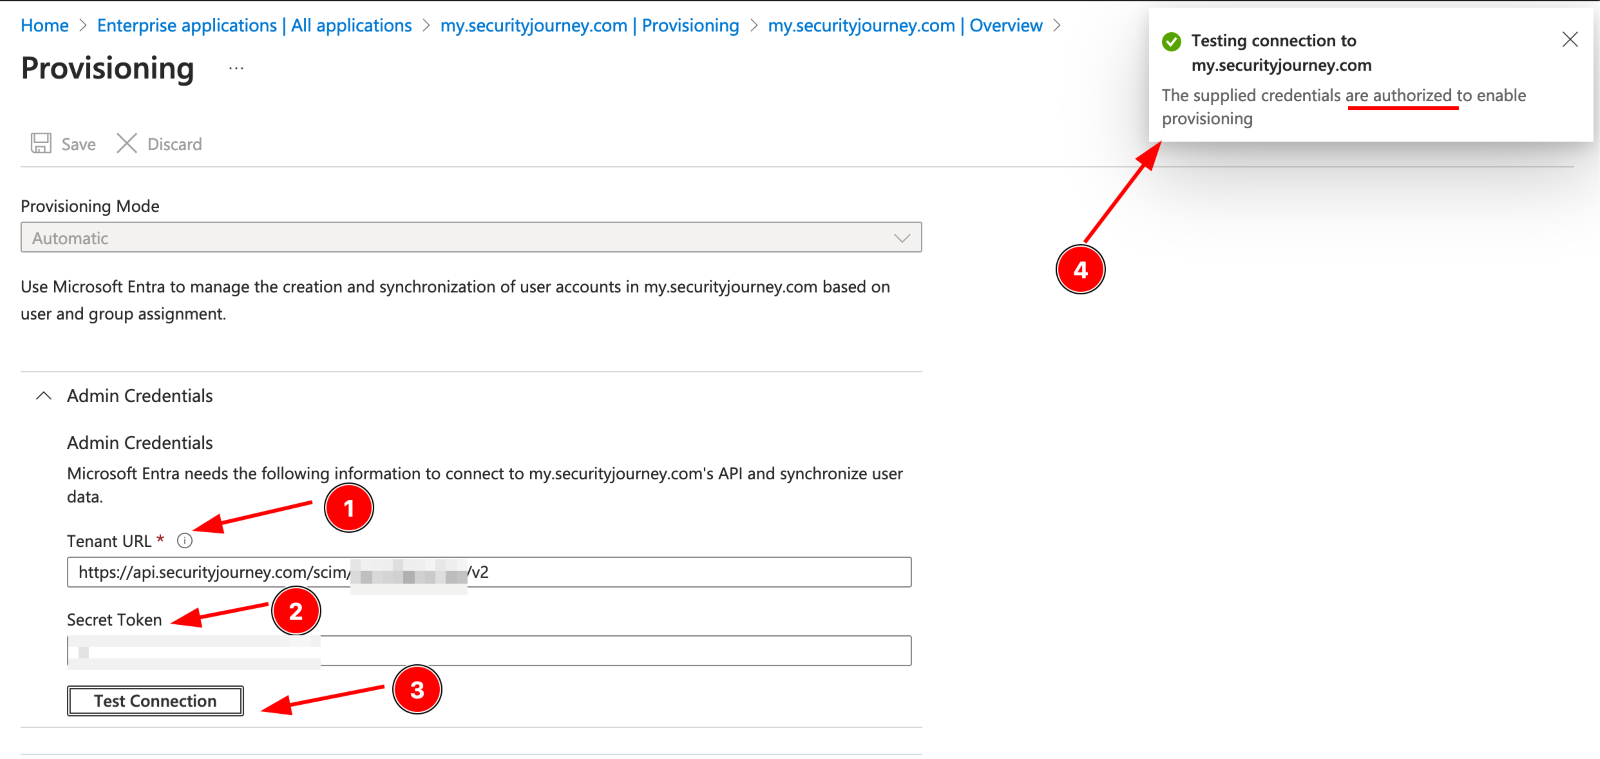
In your IdP SCIM configuration, enter:
-
SCIM Base URL → (Security Journey SCIM API URL)
-
Token / Secret → (Security Journey SCIM API Token)
-
-
Click Test Connection
-
A modal will popup indicating success or failure.
-
Step 4: Configure Mappings
Under Mappings, you will need to update the Provision Azure Active Directory Groups setting from Yes to No.
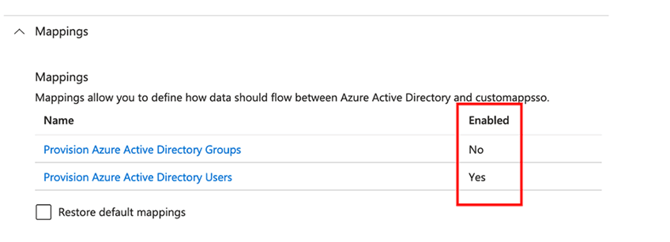
Note: We do not support group provisioning at this time. Enabling group provisioning will result in a failed sync.
Step 5: Review User Attribute Mappings
Microsoft Entra ID comes with a preconfigured set of attribute mappings to Security Journey. In most cases, you can use these default mappings as-is.
If you need to include additional supported attributes or customize how data is sent, you can modify the mappings in this step.
Troubleshooting
SCIM is enabled and syncing but you see this error: An HTTP/404 Not Found response was returned rather than the expected HTTP/200 OK response. To address this issue, ensure that the tenant URL is correct. The tenant URL is usually in a format like: https://<>/scim. If this does not resolve the issue, contact the application developer to ensure their SCIM endpoint conforms with the protocol https://tools.ietf.org/html/rfc7644#section-3.4.2
Please review the Provisioning settings and ensure that the Mappings settings for "Provision Azure Active Directory Groups" is set to Enabled = No.
